The first thing you need to do is unzip the two zip files into a common directory. I’ve chosen to create an "12_1" folder. Oracle creates a database folder inside it. Within the database folder, click the Setup file as Administrator to launch the Oracle Installer.
After launching the Oracle Installer, the Configure Security Updates screen is your first stop. You may provide your email (attached to your Oracle Support Contract) and Oracle Support password, or uncheck the box and you can simply install a Desktop test environment. Click the Next button to proceed.
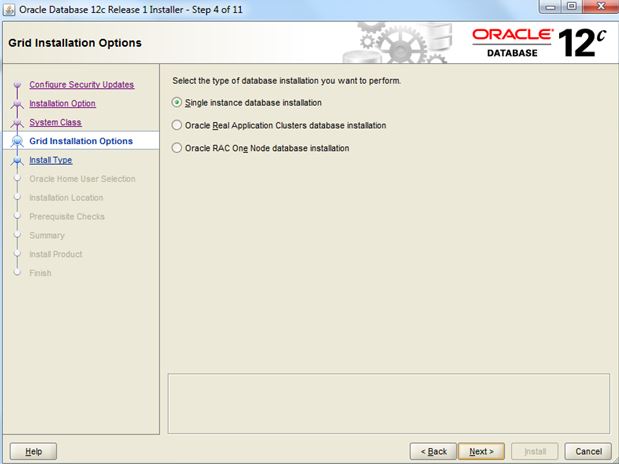
The Installation Option screen lets you chose whether you want to Create and configure a database (sample database), Install database software only, or Upgrade an existing database. Check the appropriate radio button and then click the Next button to proceed with the install.The System Class screen lets you chose whether you want to install a Desktop class (ideal for developers to play around in) or a Server class. Check the appropriate radio button and then click the Next button to proceed with the install. The Grid Installation Options screen lets you choose type of database installation you want to perform. Check appropriate button to proceed with the installation.The Select Install Type screen lets you choose whatever you want to use Typical Install or Advanced Install. Check the appropriate button and click the next button to proceed with the install.The Oracle Home User Selection screen lets you chose whether you want to Use Existing Windows User (that’s fine if you created one previously), Create New Windows User (what I’ll do next), or Use Windows Built-in Account. Check the appropriate radio button and then click the Next button to proceed with the install.The Typical Install Configuration screen lets you customize your installation. I’ve only opted to provide an Oracle compliant password while accepting the defaults. Click the Next button to proceed with the install. The Perform Prerequisite Checks screen initially displays a task bar. You need some patience, it’ll show you the next screen if everything is fine. The Summary screen tells you what you’re going to install. Read it over, save a copy for later, and when everything is right then click the Next button to install. The Install Product screen tells you what you’re installing and it can take some time. Don’t walk away too quickly because you’re most likely going to have to allow access for the installation to complete successfully.You should see two Windows Security Alerts with the installation. Click the Allow access button to continue successfully.The Database Configuration Assistant screen tells you that you’ve been successful to this point. The second Database Configuration Assistant screen lets you configure passwords for the database accounts. I’m skipping that by accepting the defaults and clicking the OK button to proceed. The Finish screen appears after everything has worked. Click the Close button to finish the install.Now, you can open a Windows command shell and call the sqlplus executable. Try connecting using system and type password. You should see the following in the command shell when the installation was successful.


 Welcome screen, Click "Next"
 Choose "Create Repository" and then "System Load and Product Load", Click "Next"
 Database Connection Details
 Repository Creation Utility will check Prerequisites, you should see below, Click "OK"
  Choose Components "AS Common Schemas" and "Oracle Data Integrator", click "Next"
 RCU will check Prerequisites, you should see below, Click "OK"
 Define password for main and auxiliary schema users, click "Next"
 Define
 Map and Create tablespaces, Click "Next"
 RCU will create Tablespaces, Click "OK"
 Summary, Click "Create"
 Summary
 Repository Creation Done, Click "Close"